Ad360 is a certified Google Partner
Google has introduced in February 2022 a new Partner Program, with more robust Partner requirements.
This is a way for Google to certify businesses that have the required skill, experience and knowledge to help businesses run more successful Google Ads campaigns.
Ad360 is honored and proud to have been certified as a Google Partner under this new program launched in February 2022.
This certification recognizes the value that Ad360 brings to its users. Thanks to the integration of Google Ads campaigns in our Apps, Ad360 users are more likely to succeed and get better outcomes out of their advertising campaigns.
Google Ads is a fantastic and rich environment, that many businesses use to find new customers. However, its vastness sometimes also makes it difficult to navigate for business owners who don’t have professional advertising background or skills, especially given the numerous Google products and platforms included in Google Ads: Search Engine ads, YouTube ads, Gmail ads, Google Maps ads, all with many ad formats and features to master.
Ad360 helps users get the most of Google Ads. Thanks to automatic management and campaigns optimization using the years-long Research & Development of Ad360, they maximize the results of their campaigns. Plus, all these campaigns can be managed under one roof, along with other Social Media platform ads, and ads that run in millions of independent websites and mobile.
If you’d like to learn more, and get helped to run successful Google Ads campaign, please book a demo and see Ad360 App in action for yourself.
Frank’s story pt4: how to easily get visuals

If you’ve been following the “Odyssey of Frank’s Shopify Store” with Ad360, you know Frank went from a dated brick-and-mortar salesman to selling online during the pandemic.
He could even implement savant geolocation targeting and other advanced advertising features thanks to Ad360. His ads no longer went unnoticed in Google and Facebook.
Moreover, he now had access to millions of websites and mobile apps to advertise on.
However, there is a final promotional piece to the puzzle missing here…
Frank and many Shopify store owners getting started with digital advertising face this roadblock.
Sleek, professional, truly eye-catching ad banners.
Who generates them?
Frank read online that most Shopify store owners in his position relied on some third-party app, no matter what they approach. Some downloaded Canva online to paste together a basic ad (which they had to remake over and over), while others hired an Adobe pro illustrator… for hundreds of dollars per banner. Oof.
Frank majored in business management – not graphic design…
Yet, here, he felt the success of his Shopify store depended on having a variety of ad banners to deploy across the web. Being a one-man-show, Frank already handled all the daily responsibilities of keeping his Shopify store running and his social media at a “base engagement” level. Adding on the burden of pumping out creative ad banners gave the guy a headache. He made one while rushing, and within 30 minutes, his buddy reached out: “Dude, you know that Shopify store ad you just posted on Instagram? It’s off-center dude. It looks like you were drunk when you made it. Just a head’s up.”
Before slamming his head on the desk in frustration, Frank reached out to Ad360’s 24/7 support. They reminded him their software has one of the most powerful creative generator tools in the industry…
Ad360’s creative ad banner feature generates 15 distinct ads of different shapes, colors, and sizes. Even better, the pictures and pricing were automatically extracted from his Shopify store data.
The guy didn’t have to lift a finger – all these creative, professional-standard ads generated instantly from Ad360’s suite of features.
Frank no longer felt “washed out” or limited testing different Shopify store ads on the web. Some were designed for “above-the-fold” viewing, some for “below-the-fold” placements, and others for almost any ad inventory shape you can think of.
Even better, Frank found it super simple to keep track of which of these ads performed the best – Ad360 kept that data organized on his Shopify store dashboard. Plus, Ad36 automatically focused on the ads bringing the most visitors and buyers to Frank’s website.
Are you spending hours creating your own ads, only to throw them up and get a less-than-stellar return on ad spending (ROAS)? Please reach out, and try our free demo of Ad360 today for access to our “instantaneous ad generation tool.”
Never again will you waste your precious hours centering a single ad on Canva or Adobe: you’ll get 15 original designs with the snap of a finger.
All powered by Ad360’s suite of services – try our free demo today to see if it can boost your sales and change your life!
How to create a Line Item?
A step-by-step guide to starting a line item from scratch in Ad360 App for Shopify
A Line Item contains settings allowing Ad360 to know which audiences to target (e.g. focusing on specific geolocations) and which creative asset to show them.
1. Select your Campaign
Firstly, you need to select the Campaign under which you want the line item to be created. To do this, go to the campaign section and you will see a list of your campaigns.
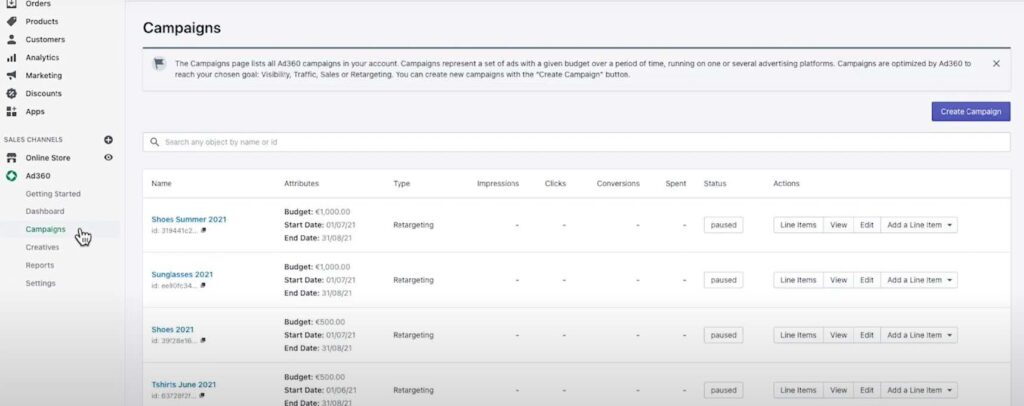
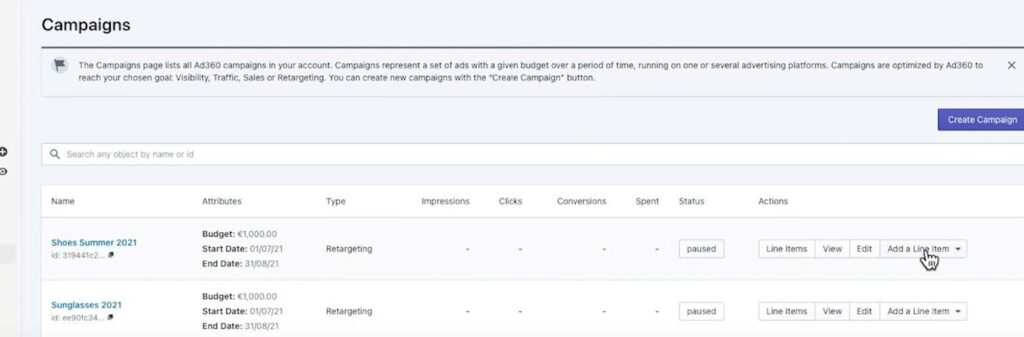
2. Add Line Item
You can add a line item from the campaign page, or directly from the “Add a Line Item” button.
3. Select a Line Item type
If you click the “Add a Line Item” button you are given the following options: Menadex, Google Ads or Facebook.
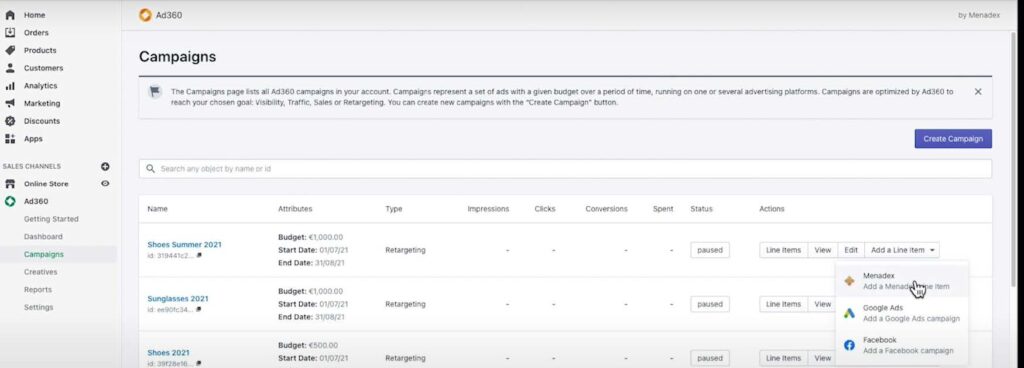
Google Ads and Facebook allow you to import into Ad360 advertising campaigns even if they run on the Google Ads or Facebook platforms, so that you can manage all your ads in one place.
Menadex is our own media offering, enabling your ads to run on millions of independent websites and mobile apps. More details below:
➔ Menadex line item option.
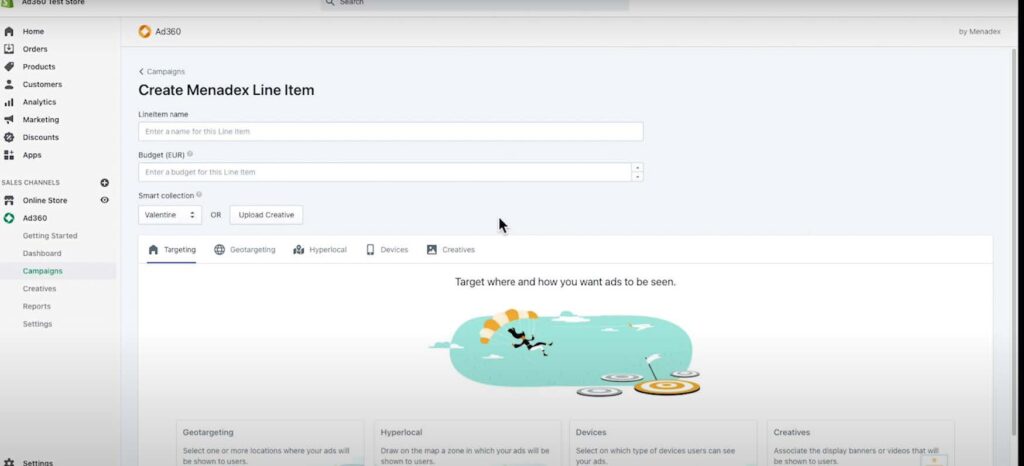
When you have clicked onto the “Menadex” option, you will be redirected to the Menadex line item creation page. Here you can add the name for your line item and enter a specific budget.
● You can choose a “Smart Collection” from your store to use for the line item.
4. Choose an Option For Targeting
This determines where, and how many ads are going to be seen by users on theweb.
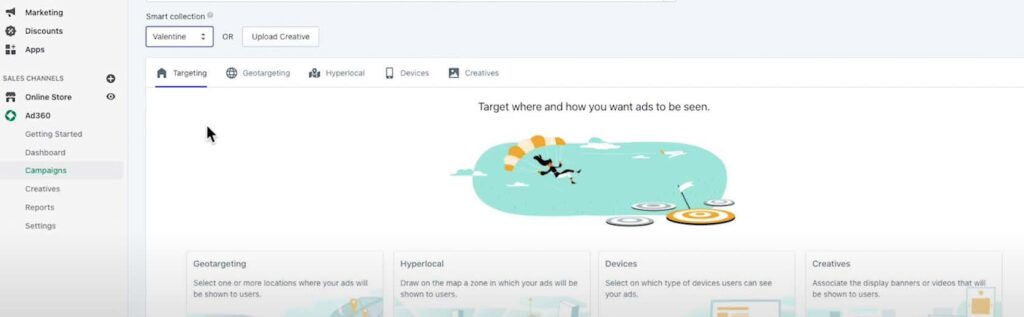
The different tabs can be accessed by clicking on the cards.
5. Option: Geotargeting
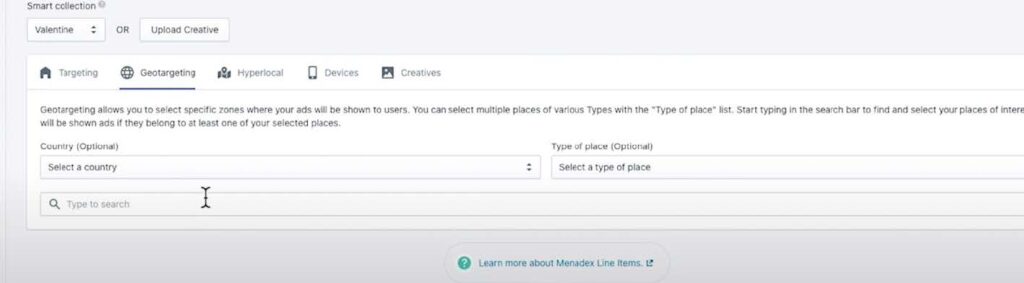
Geotargeting allows you to select specific places where your ads will be seen:
● You can select an entire country for example: the United Kingdom.
● You can also select specific cities for example: Berlin, Germany and Paris, France.
● Additionally, you can choose specific types of places, such as an airport, for example: JFK Airport. You can add as many places and types of places as you require for your ad to be displayed to web users.
6. Option: Hyperlocal Tab
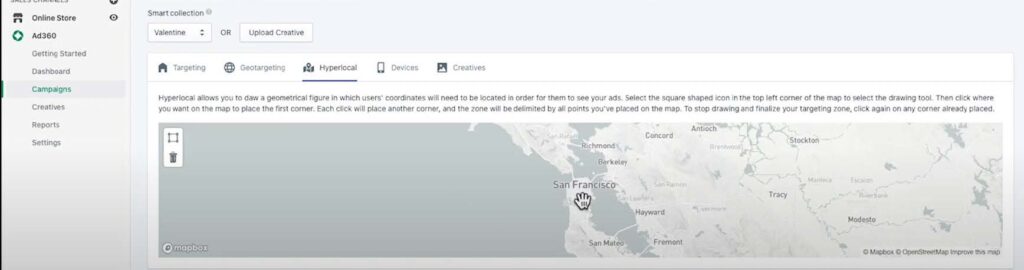
Secondly, you can add an area in the Hyperlocal tab, this will allow you to draw a specific zone on the map for your ad to be seen.
For example: San Francisco, over the Pacific Heights neighbourhood. – Your ads will only be seen in this area, and in the locations, you have selected in the Geotargeting tab.
7. Option: Devices
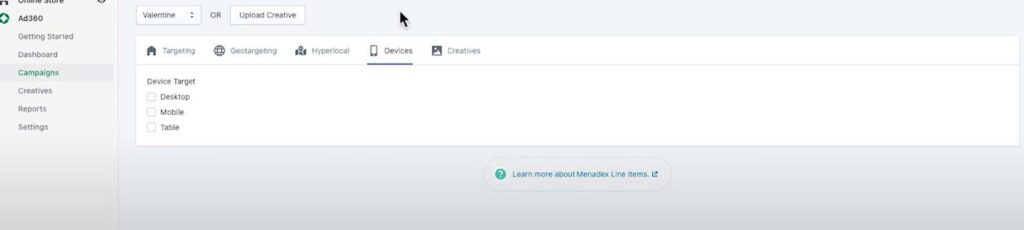
In Devices you can even select which devices your ad will be displayed on, by default, all devices are selected, however you can select only one or two if you prefer.
The options are: Desktop, Mobile, Tablet.
8. Option: Creatives

Finally, you can decide which ad banners or videos to show users: if you have creatives, you can upload them by using the “Upload Creative” button.
You can add standard banner display creatives, as per the IAB (Internet Advertising Bureau) specifications.
Choose a size in the list which matches your creative, or a video in one of the given aspect ratios.
If you already have creatives uploaded, you can associate them from your library, and you can link using the “Associate Creatives” button.
If you do not have any creative assets, don’t worry because you can create these in the Creatives Studio.
How to use the Creative Studio?
A step-by-step guide to using the Creative Studio to immediately get creatives from scratch in Ad360 App for Shopify.
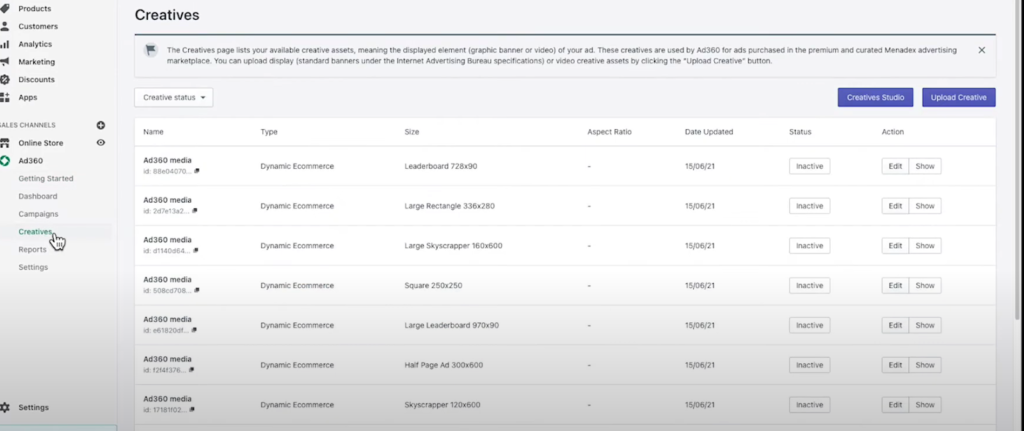
1. Go the Creatives. tab
Firstly, click on the “Creatives” link on the navigation panel to go to the Creatives page. There, click on the “Creative Studio” button to access the Creatives Studio.
2. Creative Studio Page.
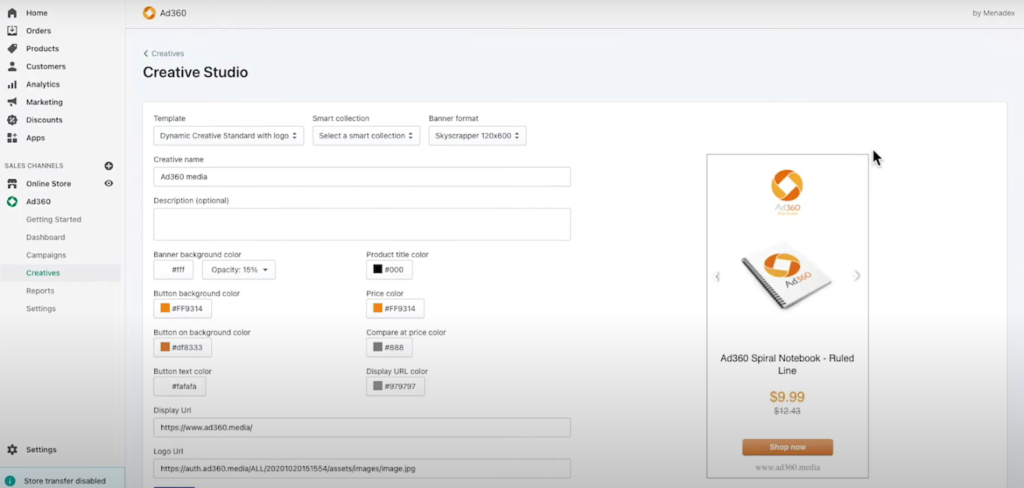
On this page, you will see banners that are automatically generated by Ad360, based on your product information in your Shopify store. You can choose a Shopify collection of products so that multiple products are automatically included in the dynamic banner.
- They will include: a product image, the product title, price and comparaison price (if you have a sale on the item in your store).
- You will have banners created in multiple formats and sizes. If you select the template you prefer, all the formats in the template will automatically be saved when you click the “create” button at the bottom of the screen.
- The banners are dynamic, meaning that if you change a product’s name, image or price, the advertising banners will automatically be updated. Plus the banner feature multiple products and will show the right one to each user based on their interest to maximize the sales opportunities.
3. Personalize your Banners.
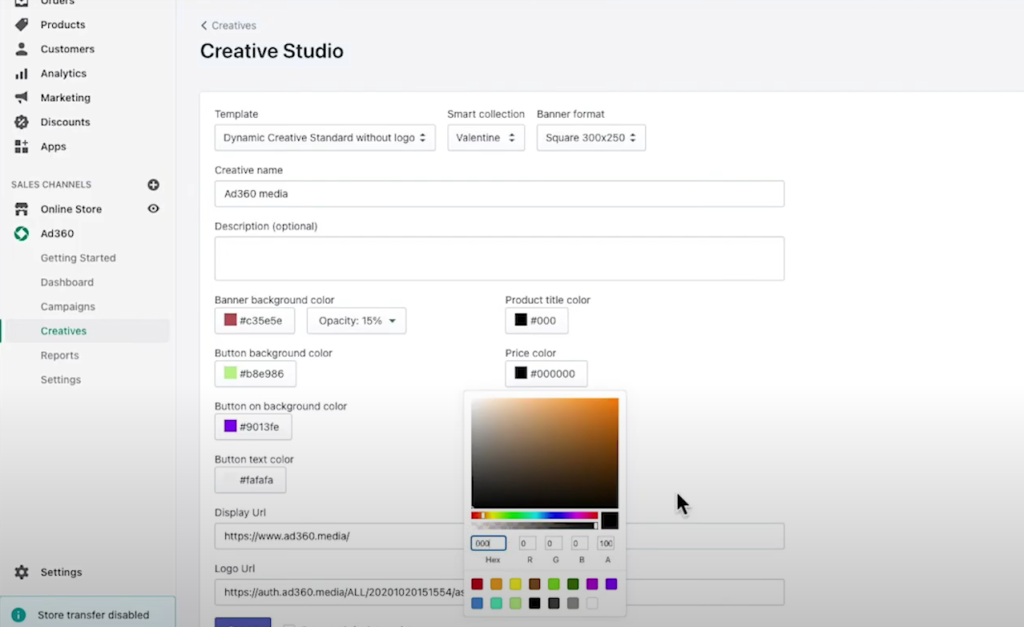
After choosing a product collection, you choose the template (e.g. with or without logo), and multiple sizes are automatically generated with your products info.
You can customize background and text colors using the buttons in the middle of the screen.
- You can change the display URL in the text box, which is shown at the bottom of your creative.
- This will not affect where the users go when they click on your product, they will still be automatically redirected to the product page within your shop, but it will simply display your website address on the creative.
- Finally, you can change the logo address which will be used for the templates containing a logo.
4. Save your template.
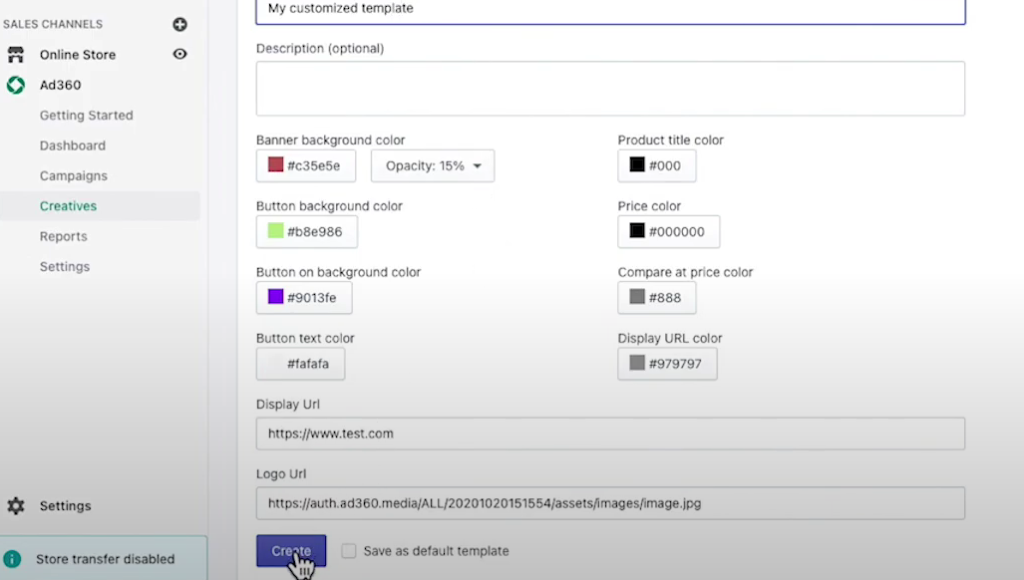
Click the “Create” button to save the templates and all formats at once. All sizes will be added to your Creatives library and can be easily added to any of your Line Items.
How to create a Campaign?
A step-by-step guide to starting a campaign from scratch in Ad360 App for Shopify
Once you’re into the App, go to either the Dashboard tab or the Campaigns tab. You can create a campaign from either page.
1. Click on the “Create Campaign” button.
Click the Create Campaign button. This is your first step to learning how to create a campaign in the Ad360App for Shopify. On this page you will find existing campaigns that you may have created before, if any.
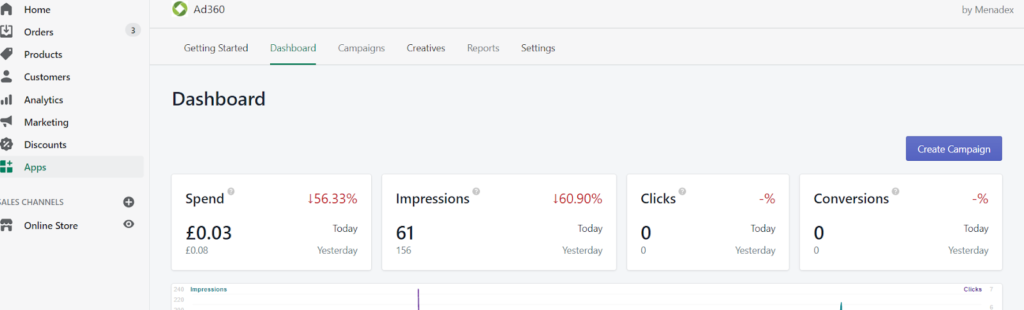
Next, On the right-hand side, there is a “Create Campaign” button. Click the button to open a simple form that you need to fill in with some of your campaigns information.
2. Enter your campaign name and budget
You need to enter a Campaign name, the Budget you want to spend with the campaign – which is the maximum amount of money you want the campaign to spend, between the start date and the end date.
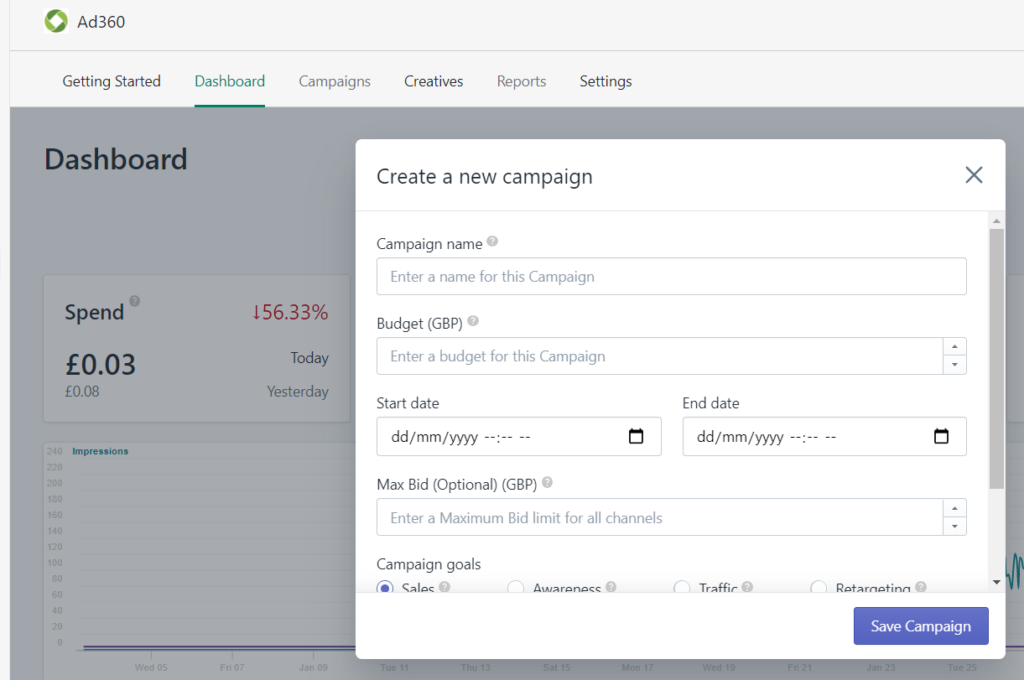
- Between the start date and the end date, you can click on the little Calendar icon to choose the dates from the date selector.
- You can then enter a Max Bid, but that is optional.
Information tip: The max bid is an amount that limits the price you pay for ads in certain channels.
3. Select your campaign goal
Select your Campaign Goal. This is the primary goal of your campaign:
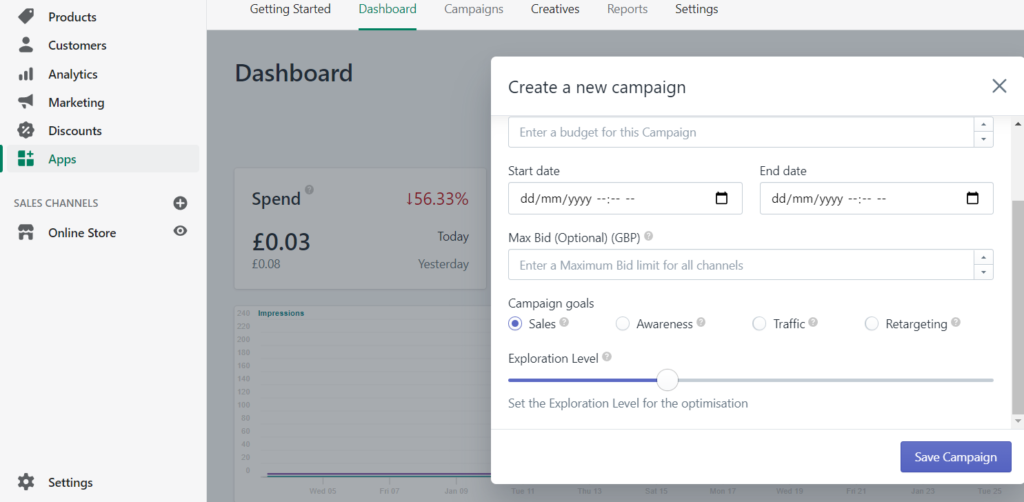
- Sales (maximizes the amount of sales from your campaign).
- Awareness (maximizes the visibility of your ads and the amount of people who see your ads).
- Traffic (maximizes the amount of people you bring to your website).
- Retargeting (is a specific type of campaign which only displays ads to people who have been on your website before).
4. Set your Exploration Goal
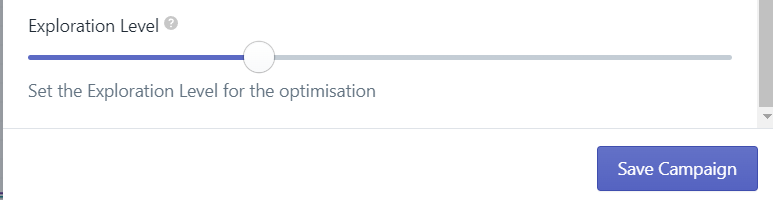
Lastly, set the Exploration Level. This determines how much of your budget is redeployed by the algorithms and gathers data.
- If you select a high value, more of your budget will be redeployed by algorithms.
- One hundred being the full budget being redeployed always by the algorithms.
- Zero meaning none of your budget will be changed, and your campaign will be in exploration mode only.
5. Save Campaign
When you are happy with the exploration level, click “Save Campaign” to create your campaign.